How to Use The Freight Desk?
Detailed step-by-step instructions for each page in the left menu. Learn how to use every feature.
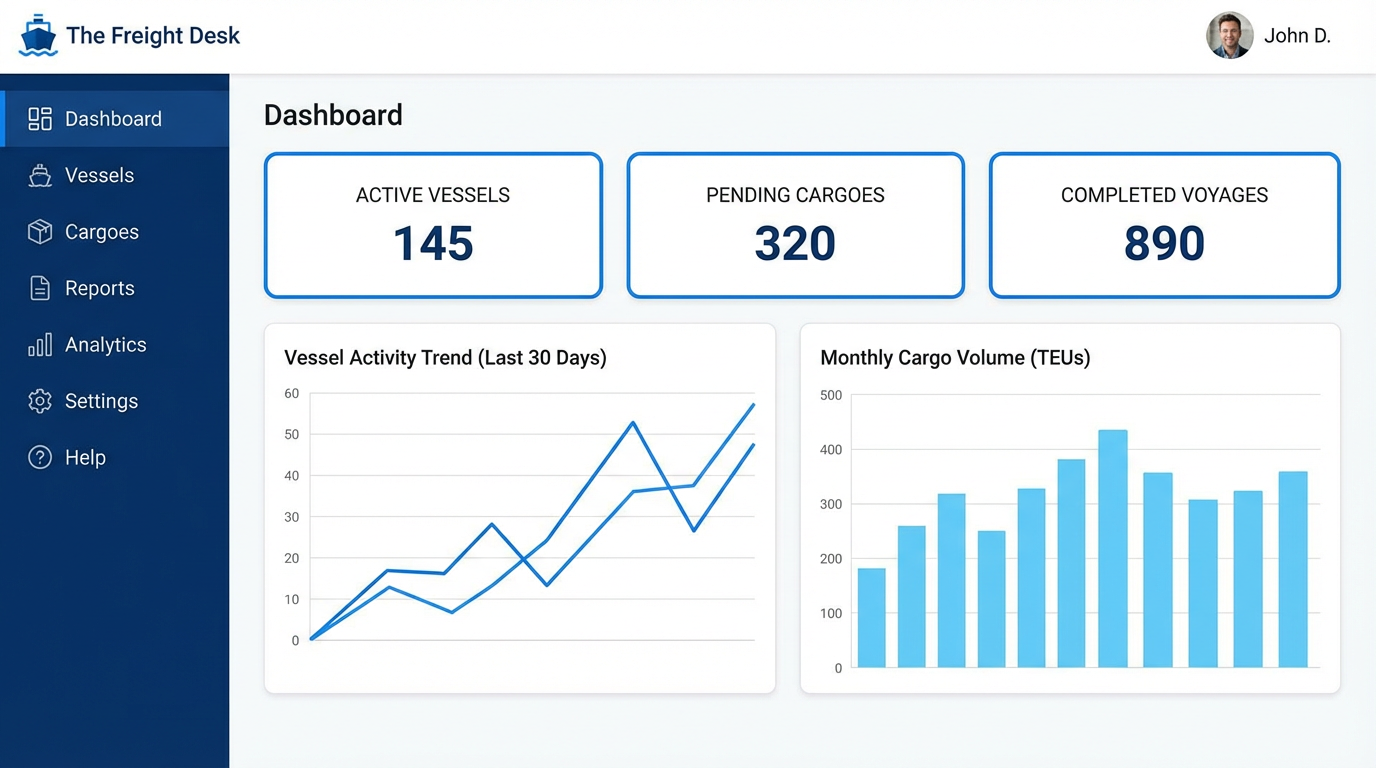
Dashboard
Overview and statistics
The Dashboard displays a summary of all system data. Today's email count, extracted vessel and cargo counts, pending invoices, and recent activities are shown here.
Step by Step Guide
Tips
- Dashboard data is filtered by your organization - you only see your own data
- Super Admin role users can see data from all organizations
- In the recent activities section, you can track who did what and when
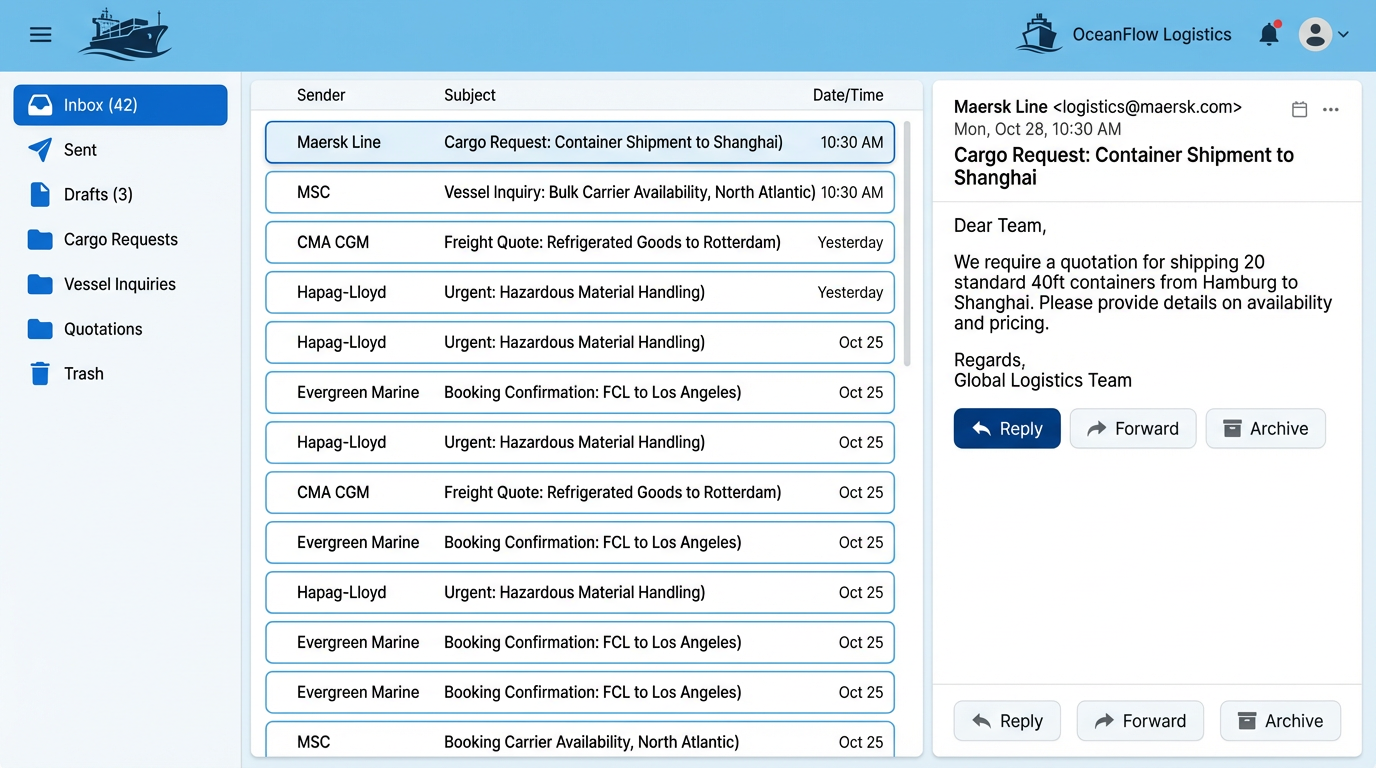
Inbox
Email management and campaigns
The Inbox page allows you to view all synced emails from your connected email accounts, send emails, and create bulk campaigns.
Step by Step Guide
Tips
- To add an email account, go to Admin → Settings → Mailboxes page
- Emails are automatically synchronized every 5 minutes
- Emails containing parsed cargo/vessel show a blue parse icon
- To reply to an email, use the 'Reply' button in the email details
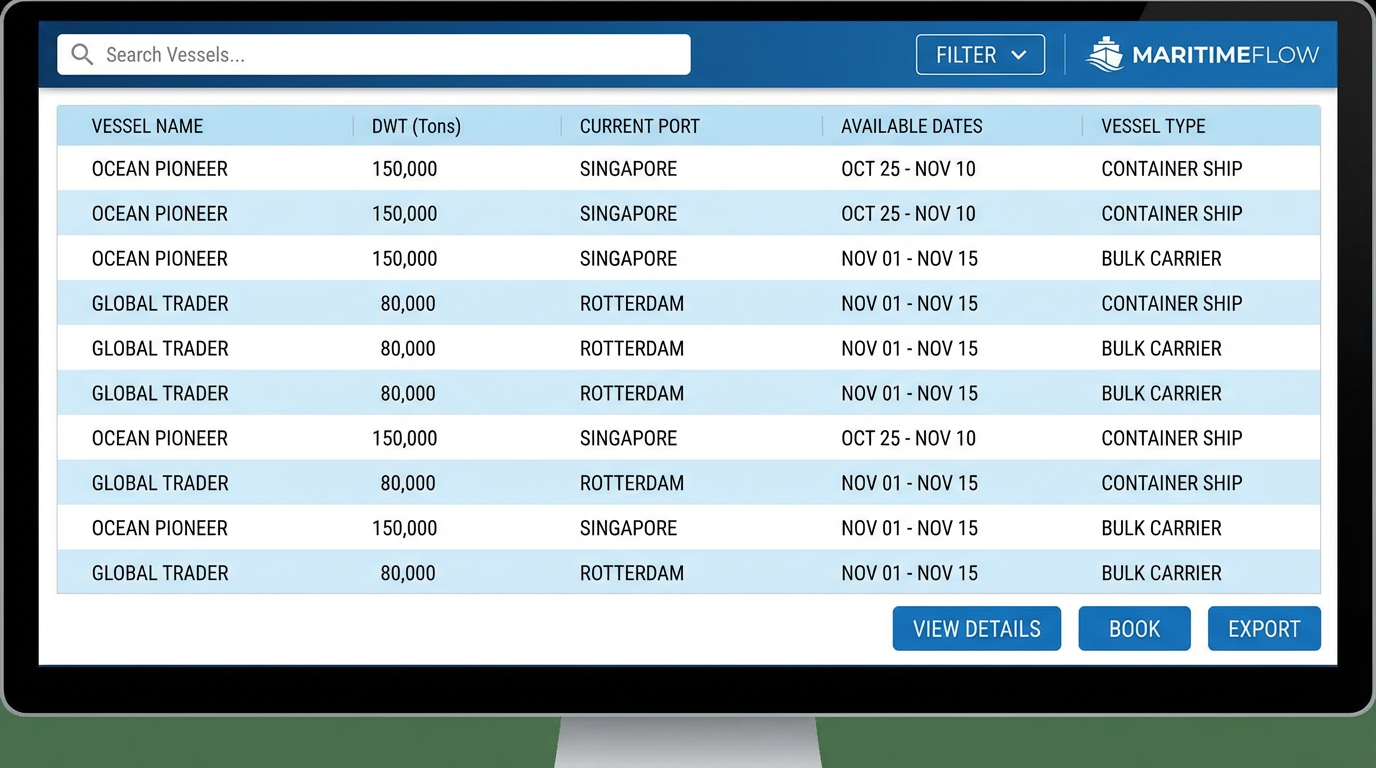
Vessels
Auto-extracted vessel positions
The Vessels page lists vessel positions automatically extracted from emails by AI. Vessel name, DWT, open port, date, and broker information are displayed.
Step by Step Guide
Tips
- If the same vessel comes from different brokers, it's merged into one row and all brokers are listed
- The urgency badge shows how soon the vessel is open (Hot/Warm/Fresh)
- Vessels added from Fleet Management are marked with 'Fleet Enriched' label
- Use the CSV export button to export the entire list to Excel
Cargoes
Auto-extracted cargo requests
The Cargoes page lists cargo requests automatically extracted from emails by AI. VOYAGE, TCT, and PERIOD type cargoes, load/discharge ports, and laycan dates are displayed.

Step by Step Guide
Tips
- VOYAGE cargoes are shown with blue badge, TCT green, PERIOD orange
- Cargoes with past laycan dates are automatically marked as expired
- When a cargo comes from multiple brokers, all broker information is collected
- Use the Export button to download cargoes as CSV for analysis in Excel
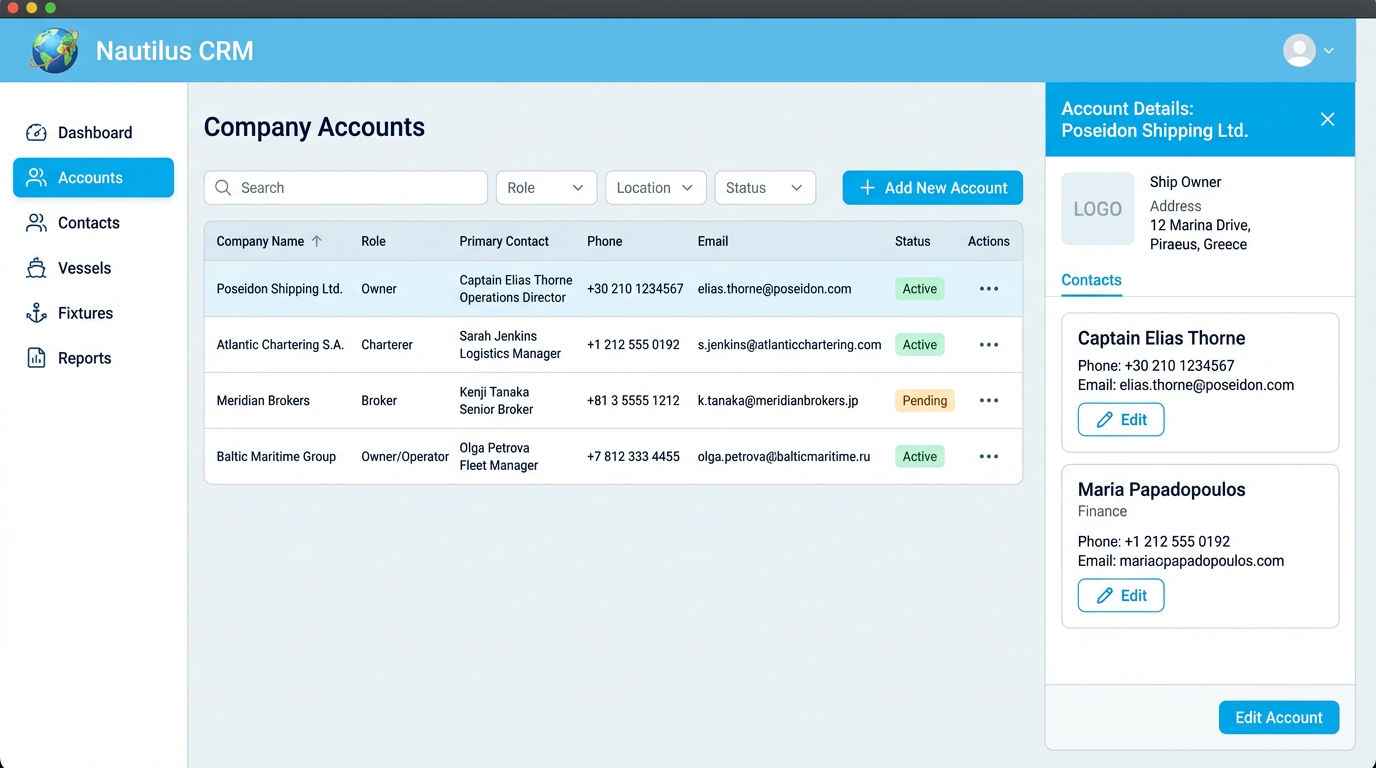
Accounts
Charterer and owner management
The Accounts page allows you to manage all charterer and owner accounts recognized by the system. Contact information, aliases, and cargo history for each account are stored here.
Step by Step Guide
Tips
- Thanks to aliases, different spellings of the same company are automatically recognized
- If 'Hide Contact Info' is enabled in Organization settings, contact information for accounts created by other organizations is hidden
- Super Admin can see all organizations' accounts and combined statistics
- Use the Export button to download the account list as CSV
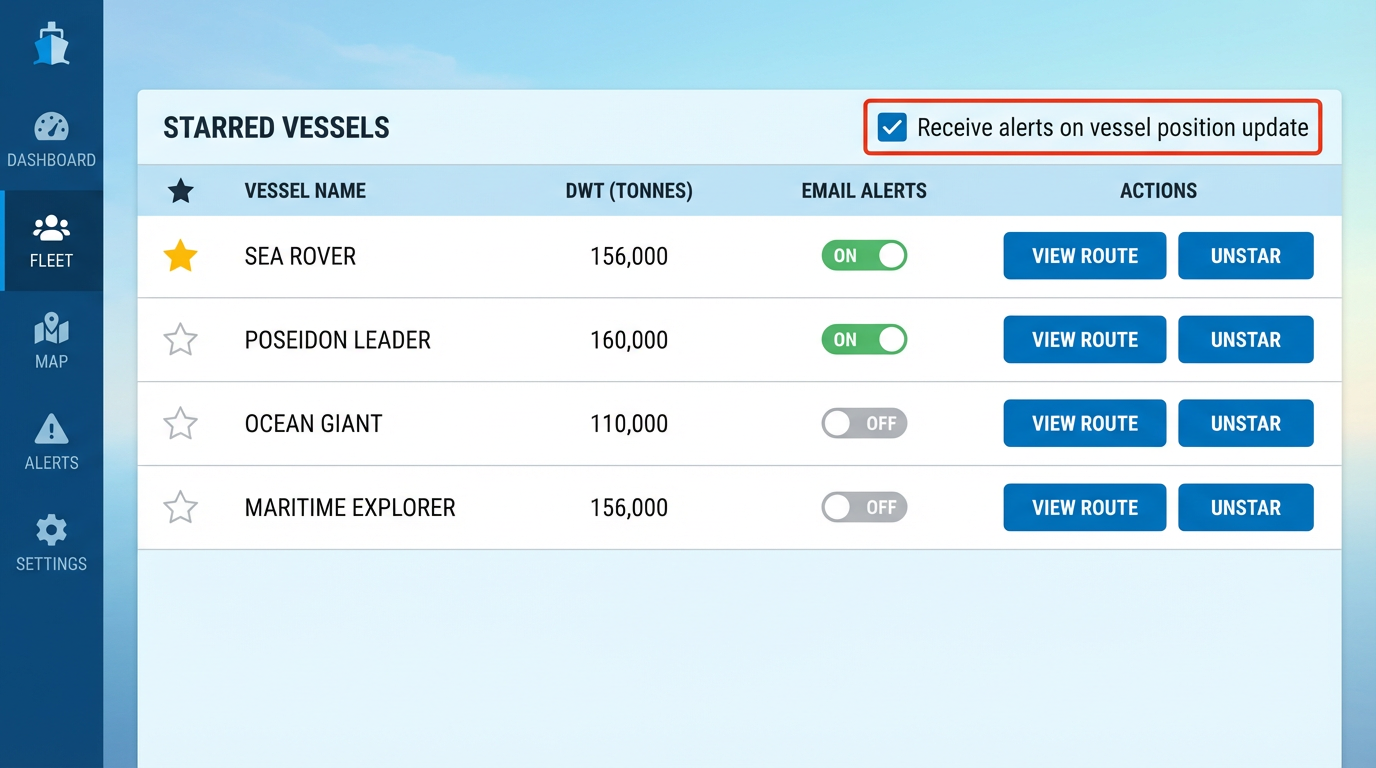
Favorites
Tracked vessels and auto notifications
The Favorites page allows you to save vessels you want to specially track and set up automatic email notifications for these vessels.
Step by Step Guide
Tips
- Mail merge fields: {vessel_name}, {dwt}, {built_year}, {vessel_type}, {open_port}, {open_date}, {imo}, {owner_name}, {target_regions}, {account_name}
- Auto-send runs at the scheduled time each day and sends emails for new cargoes
- Admin users can see all users' favorites in the organization with the 'View All' toggle
- The last auto-send date is displayed in the 'Last Sent' column
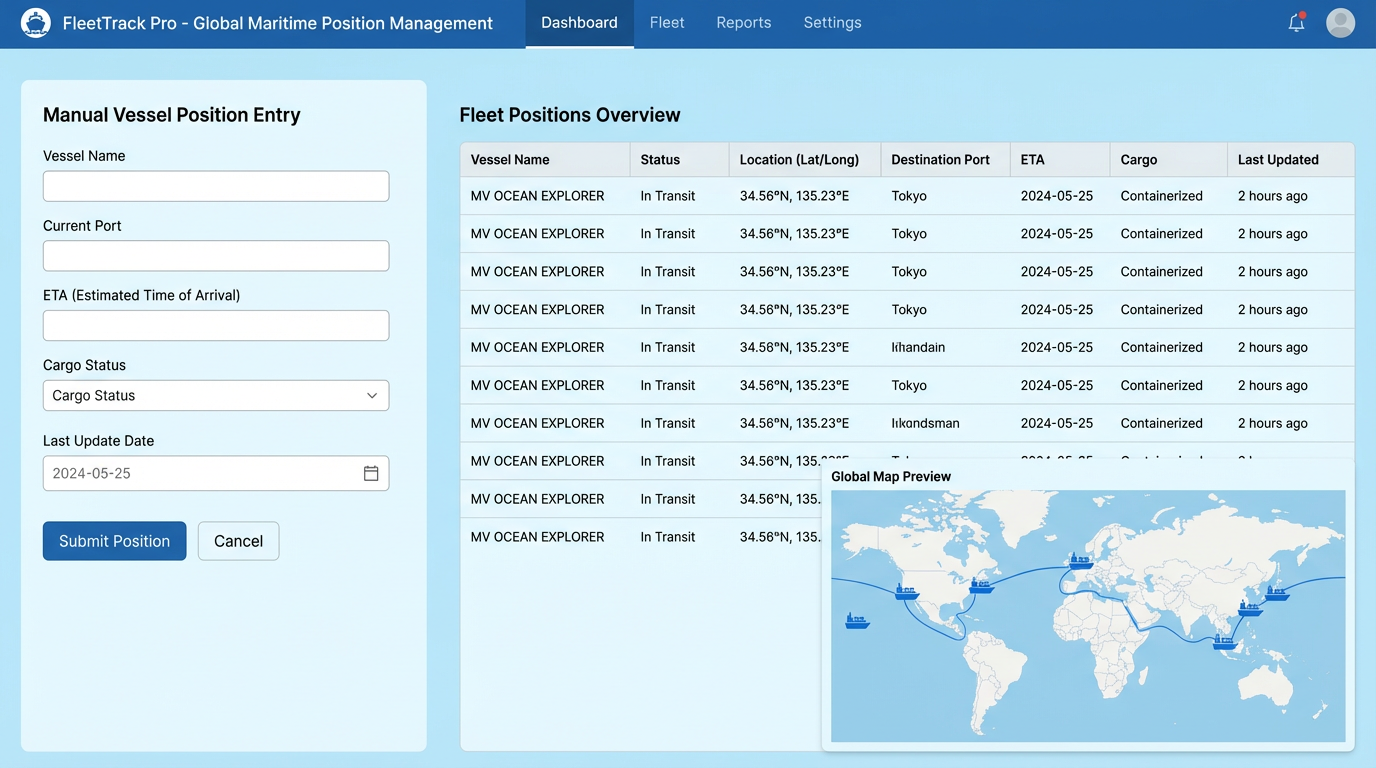
Fleet Positions
Manual vessel positions and auto email
Fleet Positions allows you to manually enter positions of vessels in your fleet or those you represent, and send automatic emails when suitable cargoes are found for these vessels.
Step by Step Guide
Tips
- The number of sent emails is displayed next to each position
- If an email was previously sent to the same cargo, it won't be sent again (duplicate check)
- Admin users can see all organization positions with 'View All'
- MIC details can be added to the email template as {mic_details}
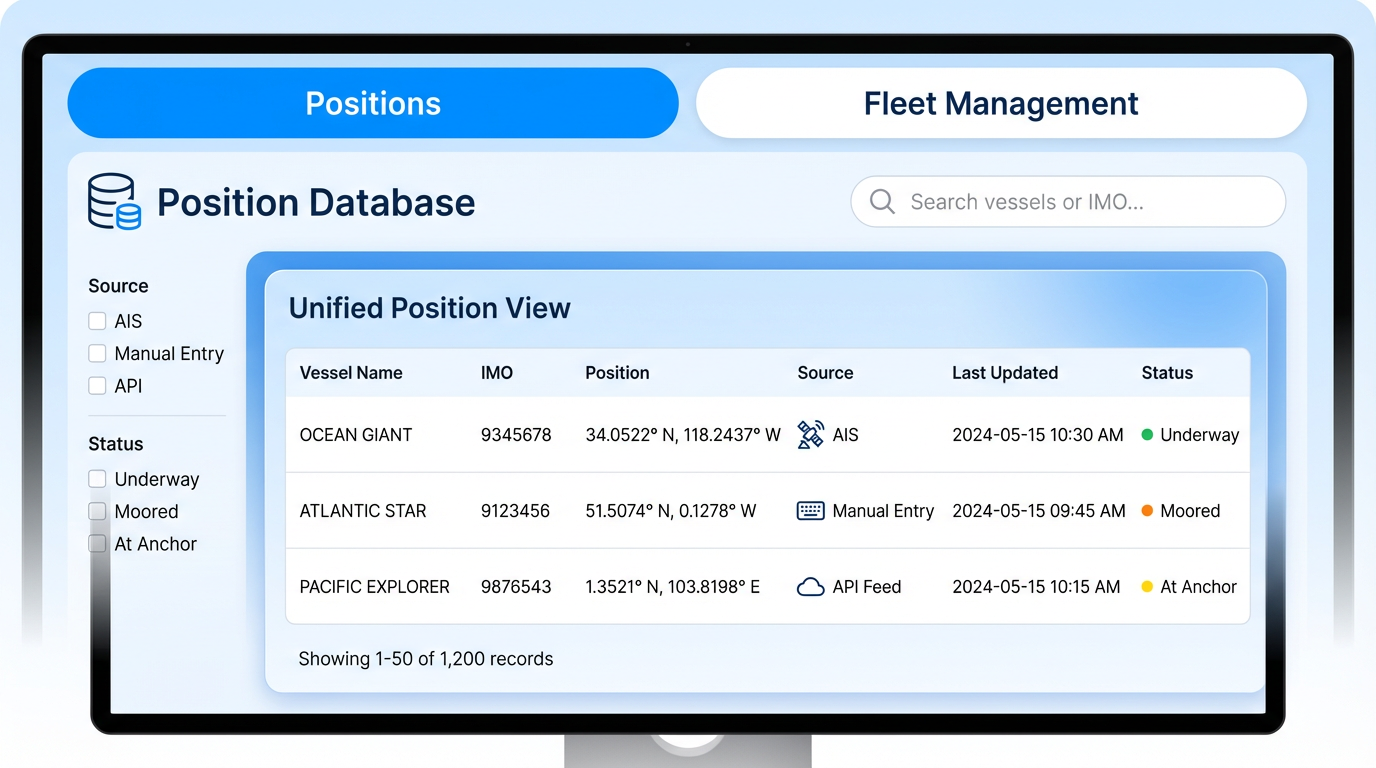
Position Database
All vessel positions database
Position Database allows you to view all vessel positions extracted from emails and manually added in a unified database. Fleet Management tab is also available for Super Admin.
Step by Step Guide
Tips
- Fleet Enriched vessels are shown in a different color from other vessels
- Fleet Management is only visible to Super Admins
- When a vessel's owner changes, updating the Fleet Owner automatically reflects the change
- Position Database is live data - updates every time a new email is parsed
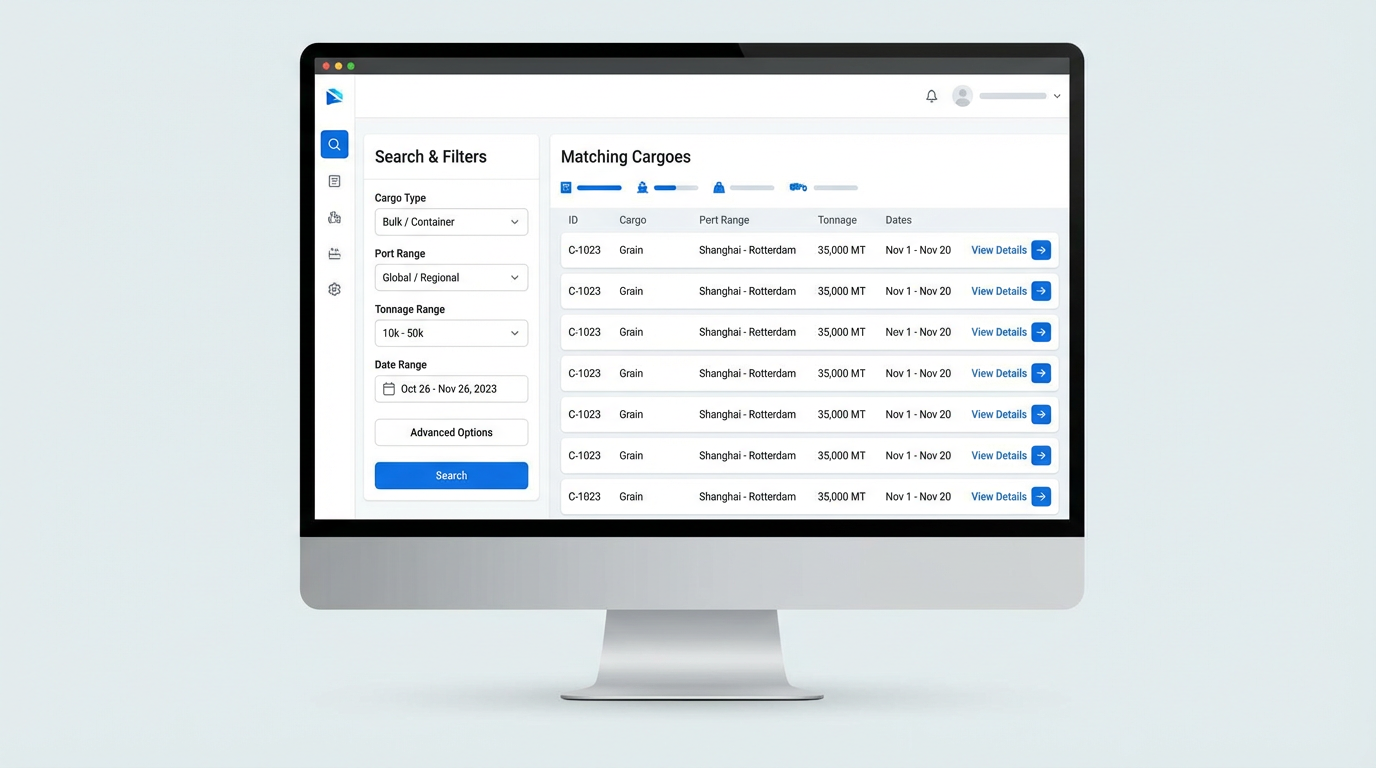
Cargo Match
Manual cargo search
Cargo Match allows you to manually search for suitable vessels in the database for a specific cargo. Enter cargo criteria and see matching vessels.
Step by Step Guide
Tips
- At least one port (load or discharge) must be entered
- Match score is determined by region match, DWT match, date match, and distance calculation
- Results are sorted from highest to lowest score
- Click on broker email to send mail directly
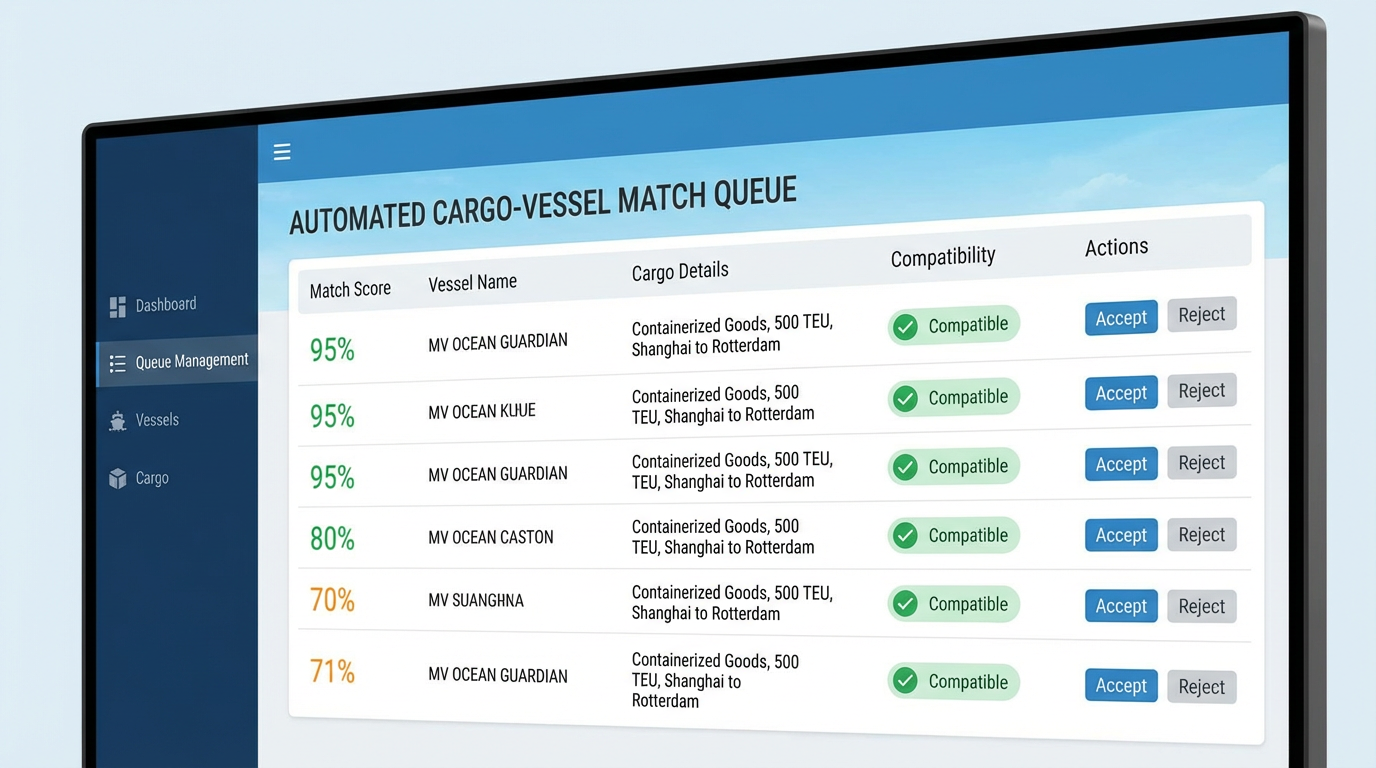
Auto-Match
Automatic cargo-vessel matching
Auto-Match is a powerful feature where the system automatically matches cargoes and vessels and adds them to the email send queue. Manage pending matches and configure settings.
Step by Step Guide
Tips
- Auto-Match runs every 5 minutes and adds new matches to the queue
- If you lower the minimum score threshold, more matches are found but quality may decrease
- If 'Account Only Mode' is on, only cargoes belonging to defined Accounts are matched
- Sent email count is shown in the Stats section: sent today, total sent, skipped
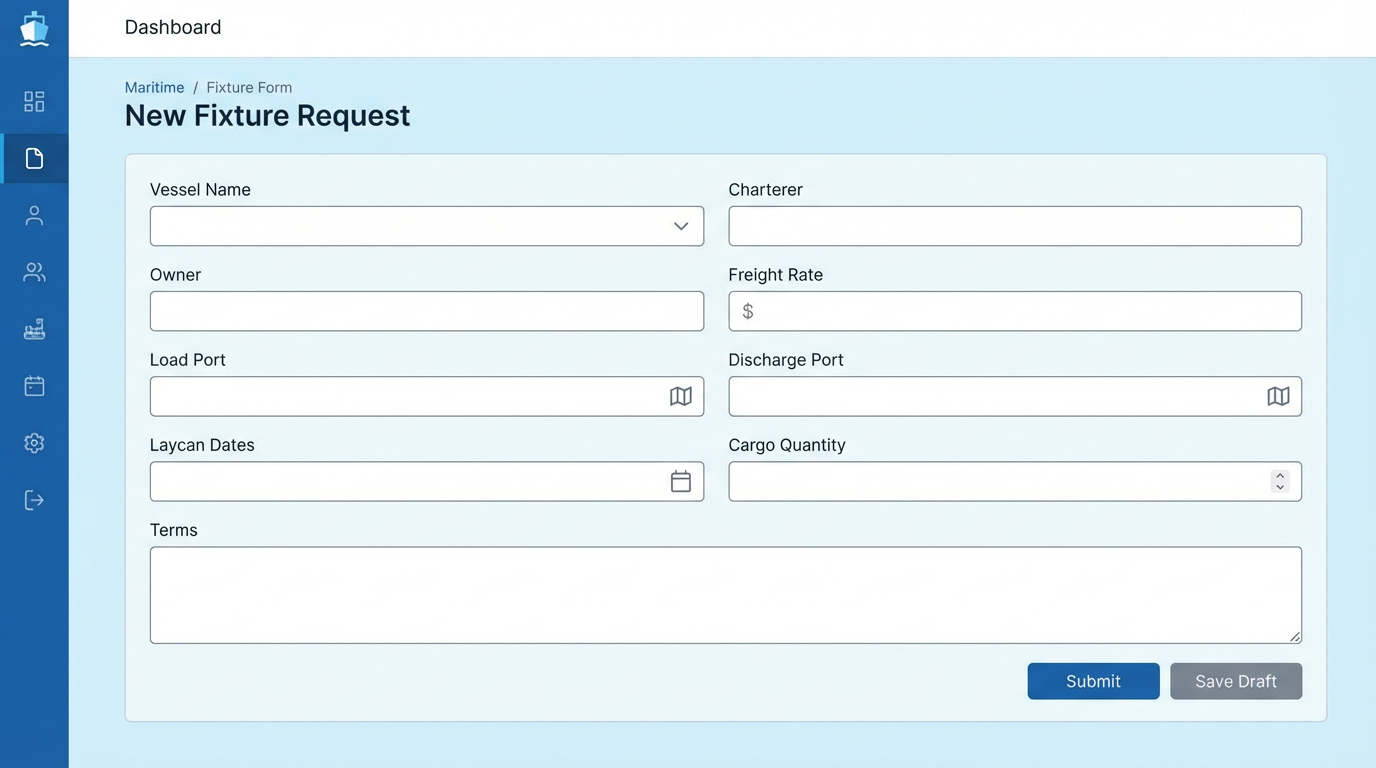
Post Fixture
Fixture and invoice management
The Post Fixture page allows you to record completed deals (fixtures), create invoices, and manage your CRM data. Contains 4 main tabs: Fixtures, Invoices, CRM, Company.
Step by Step Guide
Tips
- Total revenue statistics are shown at the top of the Fixtures list
- Overdue invoices are highlighted in red
- Upload a company logo for a professional look on invoices
- Super Admins can export all data from the 'Backup' tab
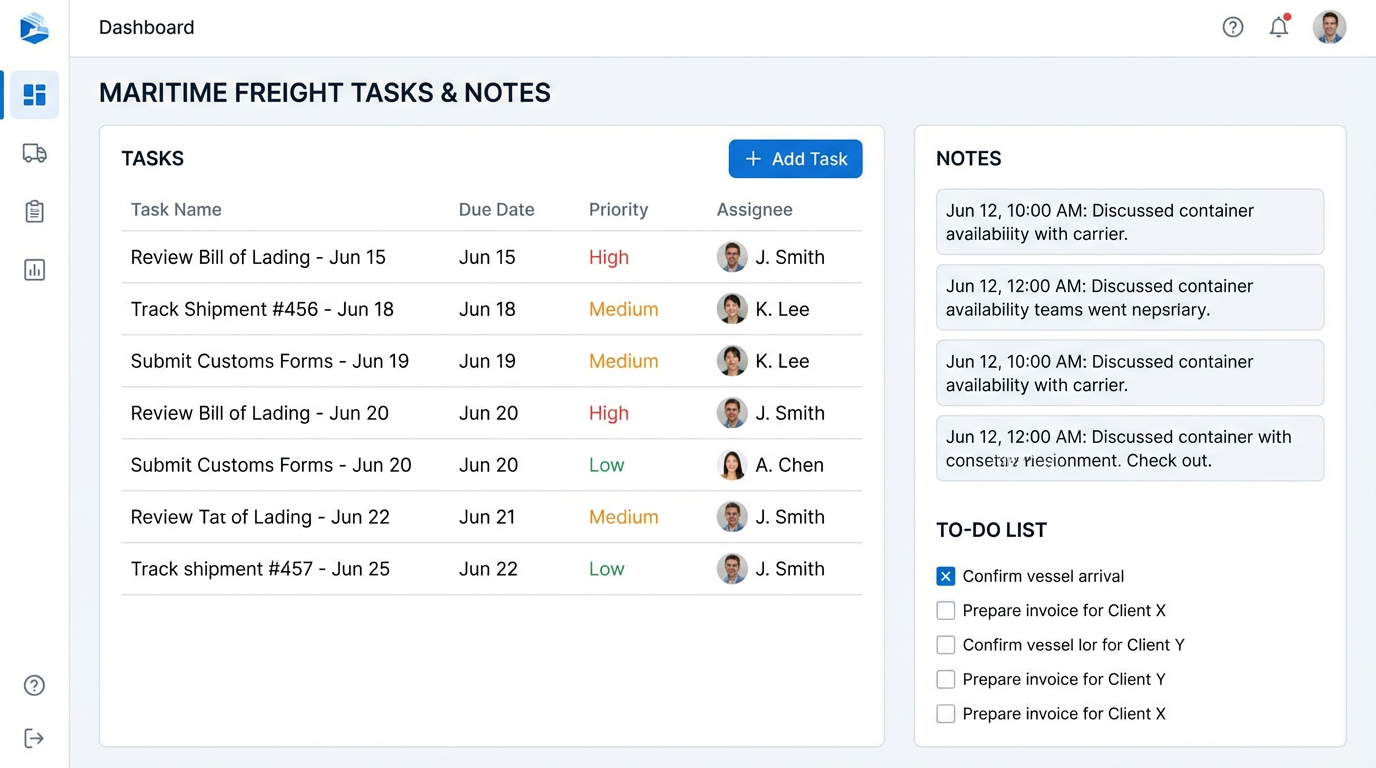
Assistance
Notes, tasks, and files
The Assistance page offers tools to support your workflow: creating notes, assigning tasks, uploading files, and global search.
Step by Step Guide
Tips
- When you select another user as assignee in tasks, that user receives a notification
- Keep notes organized by linking them to CRM records
- Search in the Files tab to quickly find files
- Global Search performs full-text search across all fields
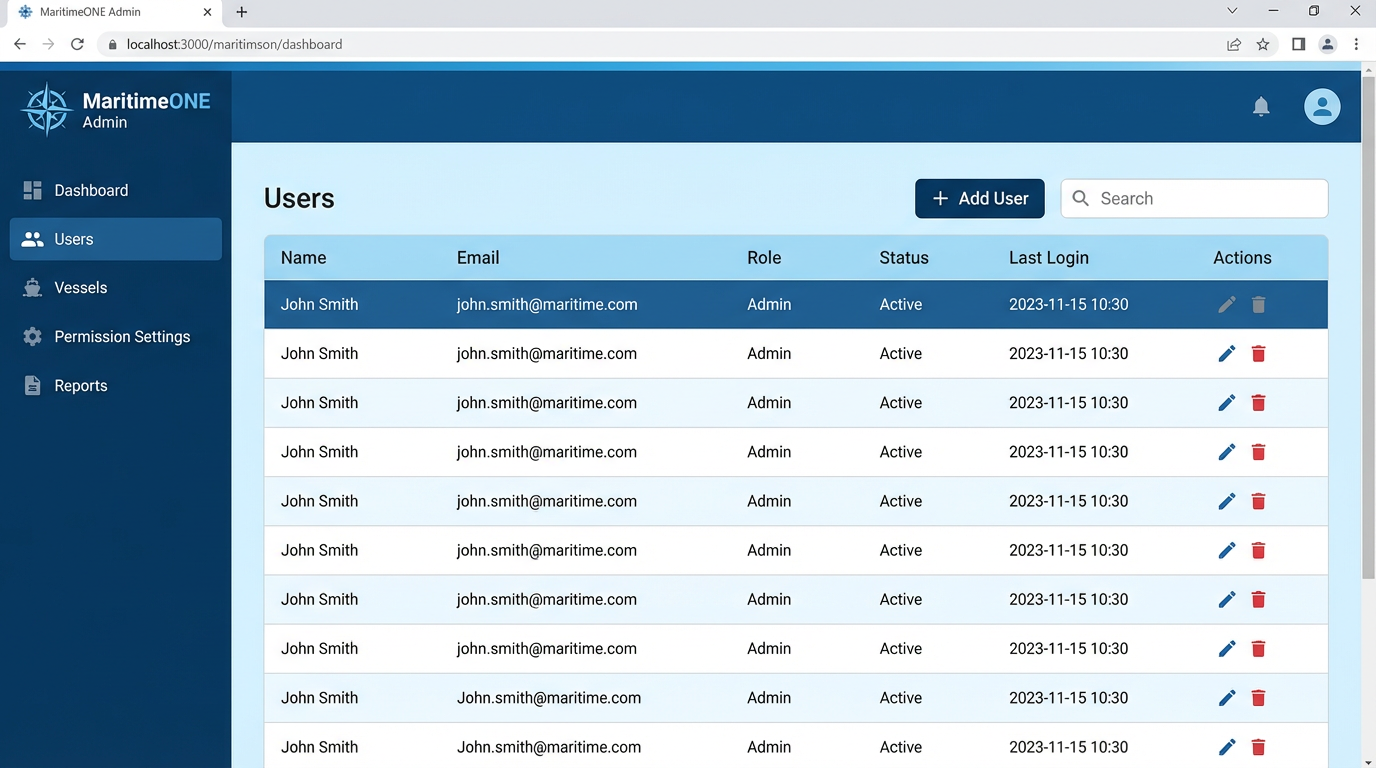
Admin - User Management
User and role management
The Admin section allows you to manage users in your organization. Add new users, change roles, and deactivate accounts. Only ADMIN and SUPER_ADMIN can access.
Step by Step Guide
Tips
- ADMIN role can only manage users in their own organization
- SUPER_ADMIN can manage all organizations and users
- USER role cannot access the Admin section
- Deleted users' data is preserved (soft delete)
Frequently Asked Questions
Ready to Get Started?
Log in to your account or request access from your administrator.